How to create, edit, delete, and export calendars in Proton Calendar
You can import calendars from other calendar apps and services into Proton Calendar(ventana nueva).
Learn how to import a calendar to Proton Calendar(ventana nueva)
It is also possible to create custom calendars in Proton Calendar. This is useful for organizing your own time (for example, having separate calendars for home and work), and for creating calendars that you wish to share with different groups of people.
Learn more about sharing calendars
If you are using our Free plan, you can create up to three personal calendars. If you subscribe to any of our paid plans, you can create up to 25 calendars.
Once a calendar is created or imported into Proton Calendar, you can edit, delete, or export it as an iCalendar(ventana nueva) (ICS) file that can be imported into most third-party calendar apps and services.
Custom calendars can currently be created using our web app.
How to create a custom calendar
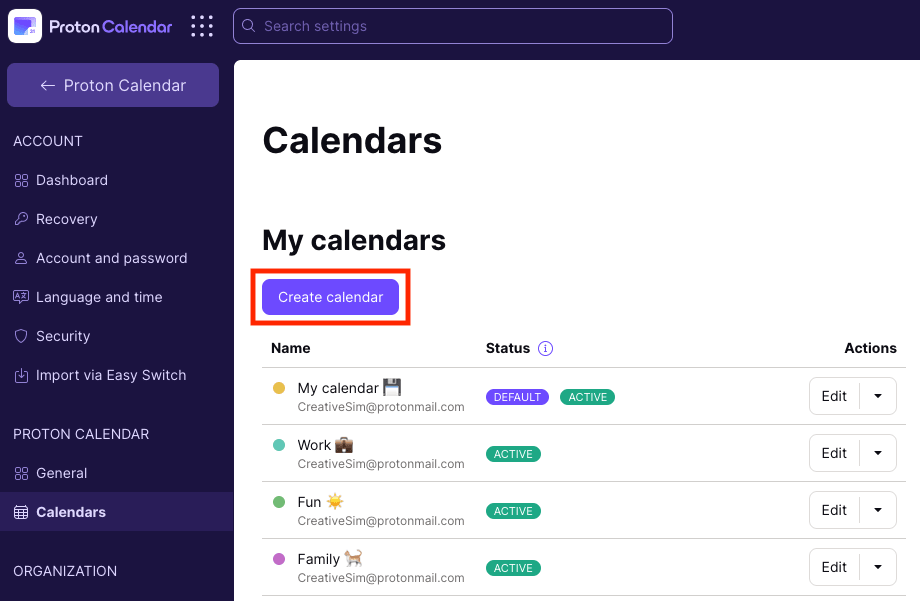
1. Log in at calendar.proton.me(ventana nueva) and go to Settings → All settings → Proton Calendar → Calendars → Create calendar.
 (ventana nueva)
Alternatively, in the sidebar of the main calendar screen, go to My Calendars → + → Create calendar.

2. You can now fill in the calendar details:
- Name — a name for the calendar. As you can see from the screenshots, this name can include any standard emoji(ventana nueva).
- Choose a color — this is the color used to display events from this calendar in the main calendar view.
- Default email address — select one of your Proton Mail email addresses from the dropdown list. Event invitations(ventana nueva) will be sent using this address.
- Display — whether or not thiss calendar is shown in the main calendaer view.
- Description — this is an opportunity to provide additional details about what this calendar is for.
- Default event duration — the default duration for new events(ventana nueva) that are assigned to this calendar.
- Default notifications — by default, these event notifications are used for all events assigned to this calendar. You can adjust these for individual events when creating a new event or editing an existing event.
- Default full day notifications — by default, Proton Calendar will notify you one day before an event starts. You can modify this or add additional full-day notifications here.
Click Save when you’re done. You can now select the newly created calendar when you create or edit an event.
How to edit a calendar
To edit a custom calendar or a calendar that you have imported:
1. Log in to calendar.proton.me(ventana nueva) and go to Settings → All settings → Proton Calendar → Calendars.
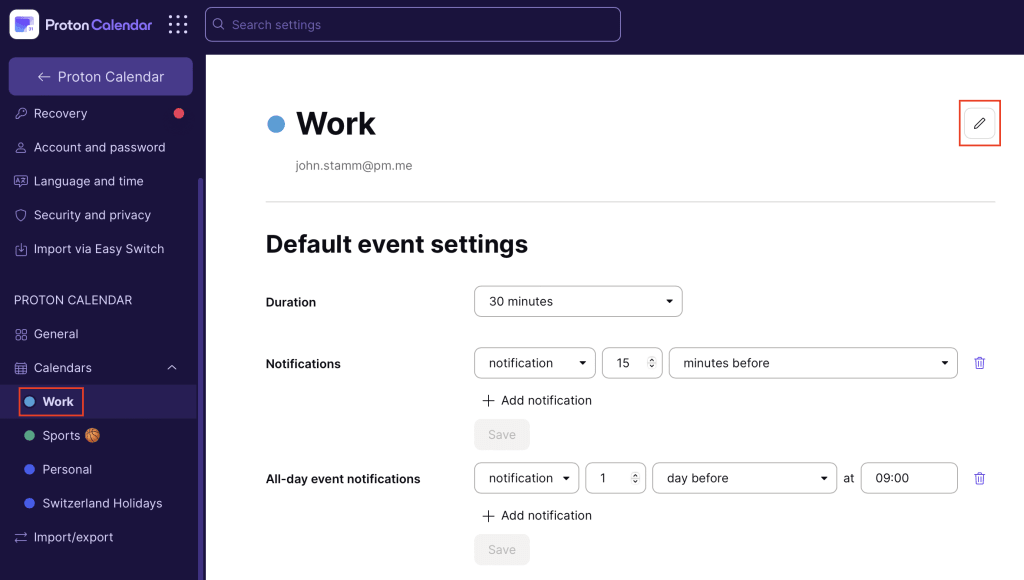
2. Select the calendar you’d like to edit in the left sidebar and click on the pencil icon at the top right.

3. You can now edit your calendar. Select Save when you’re done.
Other actions
Set a calendar as default
You can change the default calendar used when creating or importing events to any calendar that you have created or imported.
1. Log in to calendar.proton.me(ventana nueva) and go to Settings → All settings → Proton Calendar → Calendars.
2. Click on Make default to make a calendar your default calendar.
Your chosen calendar is now the default calendar.
Export a calendar
To export a custom calendar or a calendar that you have imported:
1. Log in to calendar.proton.me(ventana nueva) and go to Settings → All settings → Proton Calendar → Import/export (in the left sidebar).
2. Select the calendar you’d like to export from the dropdown menu and click Download ICS.
Delete a calendar
To delete a calendar:
1. Log in to calendar.proton.me(ventana nueva) and go to Settings → All settings → Proton Calendar → Calendars.
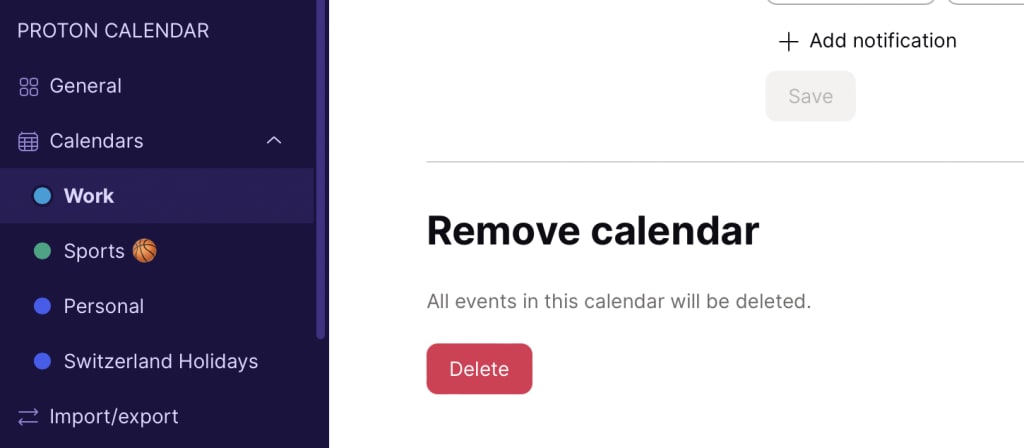
2. Select the calendar you would like to delete. Click Delete to remove the calendar.


